A mature ioBroker installation quickly accumulates several hundred objects. Most of these have a name assigned by the adapter, and nothing else. Whether a particular data point controls a light or is located in the kitchen is nowhere to be found. These two pieces of information represent rooms and functions, and they are the reason why an installation either appears tidy or, after a year, no one remembers what it is. alias.0.Etage2.Sw3 actually does.
Why the classification is worthwhile
Spaces and functions are not about a love of order; they are an interface. Whoever defines them receives in return:
- Devices : The adapter builds its device list directly from this information.
- Visualization : vis and vis-2 sort their pages accordingly, instead of you manually populating each page.
- Scenes and scripts : You can address entire groups, such as all the lights in the kitchen, without writing down a single ID. If a new device is added, it's automatically included.
- Voice assistants : Alexa and Google adopt the labels and respond to "light in the kitchen" instead of a serial number.
- Everything with type recognition : Every adapter that uses the Type Detector can find the matching devices via this feature.
The problem so far has been the effort involved. Maintaining three hundred objects by hand takes an afternoon, and that's precisely why it often gets neglected.
Where the assistant sits
Since Admin version 8.0.14, there's a guided process for this. In the Admin panel, click on Categories on the left, then select the Assistant tab at the top. If you don't see the Assistant tab, you have an older version of the Admin panel and should update first.
The framework: floors, rooms, functions
The first three steps establish the structure into which things will later be assigned.
Floors are optional. For an apartment, you can omit them, in which case all rooms will be adjacent. For a house, you choose from basement, ground floor, upper floor, and so on; you can add your own designations like "garden house." Technically, a floor is itself a room containing the rooms on that floor; the hierarchy is thus created through nesting.
Rooms are added in the second step, and for floors, one floor at a time. Items that already exist are checked and labeled "Already Existing." Important for those who already have a well-organized structure: The assistant does not modify existing elements; it only adds to them. Therefore, you can run it on an already configured installation without losing anything.
Adding functions is the third step and works the same way. One small detail is worth noting: The button in the bottom right corner is labeled "Create and continue" as long as something new is selected, and only "Continue" if there's nothing to create. This lets you see if the step actually changes anything.
Step 4, this is where the work happens
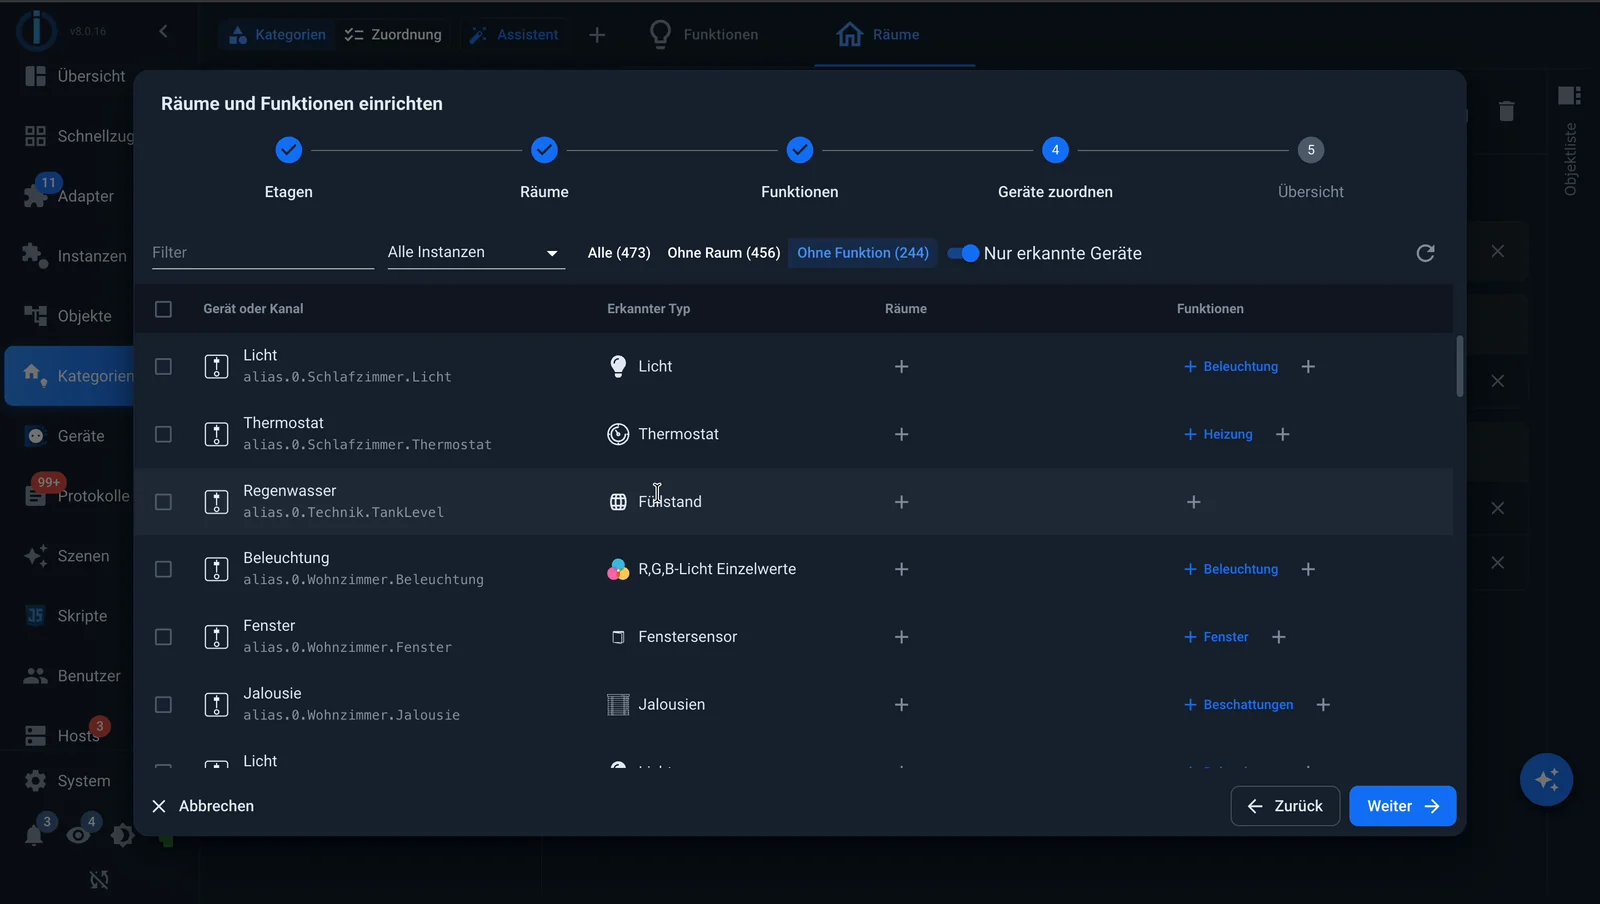
The fourth step displays your devices and channels in a table. At the top is a search field for names and a selection for the instance, next to which are three tabs: "all," "without room," and "without function," each with the number next to it. These numbers are useful: they tell you how far you've progressed. The switch on the right hides objects that have no assignment anyway, such as the instance memory.
The "Detected Type" column is the most interesting. It shows what the Type Detector has identified from the object, such as dimmer, motion sensor, or blind. If it matches, the assistant suggests the corresponding function, displayed in blue; a click confirms the selection. If the parent device already has a room assigned to it, the same room is suggested for its channels.
Three patterns have proven effective for navigating the table:
- Using the tabs : Switch to "No space" and clear the list, then switch to "No function". The counters in the tabs are your progress bar.
- By instance : Process one adapter after another. This is useful if the objects within an adapter have a similar structure and you get into a rhythm.
- Searching by room name : If your IDs contain the room name, type it into the search field and do everything at once. See the next section for details.
Multiple choice
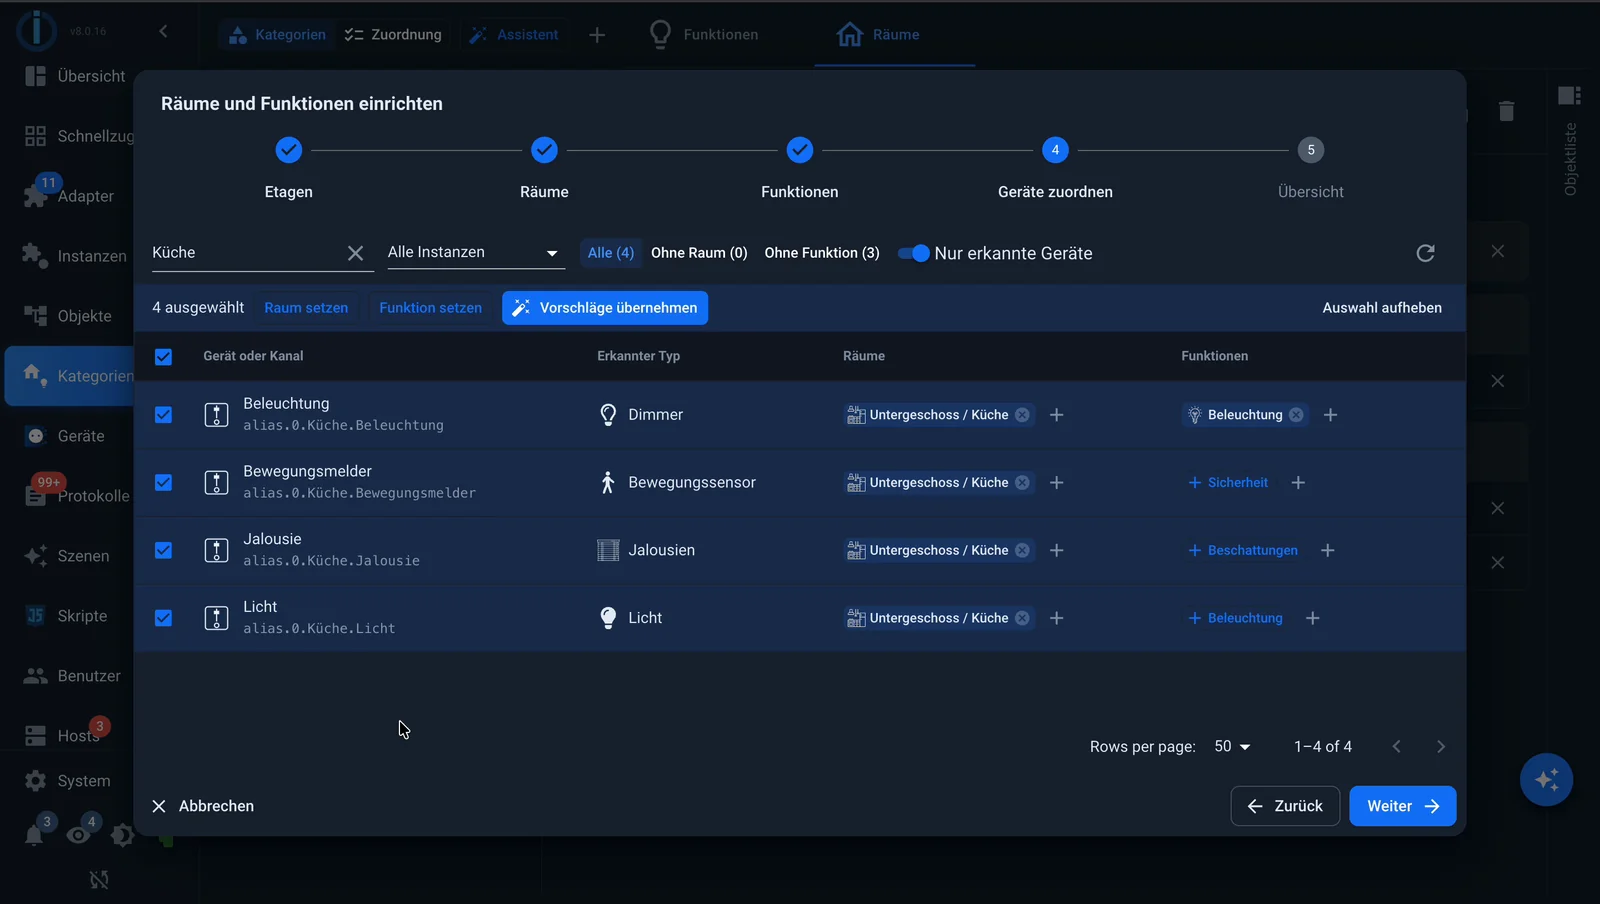
As soon as you select rows, a bar appears above the table showing the number of selections and three actions: Set space , Set function , and Accept suggestions . The last one confirms what the type recognition has found for everything that has been selected.
This is the point where what used to take an afternoon turns into just a few minutes. Filter by "Kitchen," check all the boxes in the header, select the room, and you're done. And if you then remove the filter, select everything, and click "Accept Suggestions," the rest of the functions are completed in one go. Before you do that, though, take a quick look at the "Detected Type" column, because while the detection is good, it's not foolproof.
⚠️ The assistant saves immediately
Here's what you should know before you begin: Every assignment is written the moment you make it. There's no save button at the end, and "Cancel" only closes the window without undoing anything. This is convenient when clicking through because nothing is lost, but it also means that an accidentally assigned room is permanently set. You can correct it at any time, either again in the wizard or in the category and assignment view.
The fifth step summarizes what has been created and how many objects now have space and function.
A recommendation for the order
Spaces and functions are fundamental work, but they are not the first step. We would proceed as follows:
- Create the device. The adapter integrates it into the system, along with its technical objects and IDs.
- Create an alias. An alias is a separate, descriptive data point under
alias.0, which points to the adapter's object. This makes you independent of the hardware: If a switch later moves from Homematic to Zigbee, you only change the alias's target, and scripts, scenes, and visualizations won't notice. Additionally, the device gains a clean structure that the type detector uses reliably. - Assign. Then assign rooms and functions to the aliases, not to the raw objects of the adapter.
The difference only becomes apparent after the first hardware swap, but then it's significant. Those who assign directly to the adapter objects have to do the work again each time they switch.
The whole thing in the video
If you prefer to watch: We recorded the entire run-through, a good five minutes.
If you notice anything during your review that should be done differently, please write it in the forum .